Single Sign-On and SCIM Platform Setup for ThreatCanvas On-Premises
SecureFlag supports both SAML 2.0. SCIM 2.0 is also supported for the auto-provisioning of users and teams in ThreatCanvas On-premises. Work with your Customer Success Manager to ensure the SSO configuration's correctness before diving into the training program. This guide will walk you through following Platform setup aspects:
- SAML Single Sign-On (SSO)
- SCIM 2.0 provisioning
SAML Single Sign-On (SSO)
- Navigate to the Management portal and select the Orgs tab.
- Click on Details to view organization details.
- Scroll down to find the Single Sign-On (SSO) section.
- Click on Single Sign-On & User Provisioning.
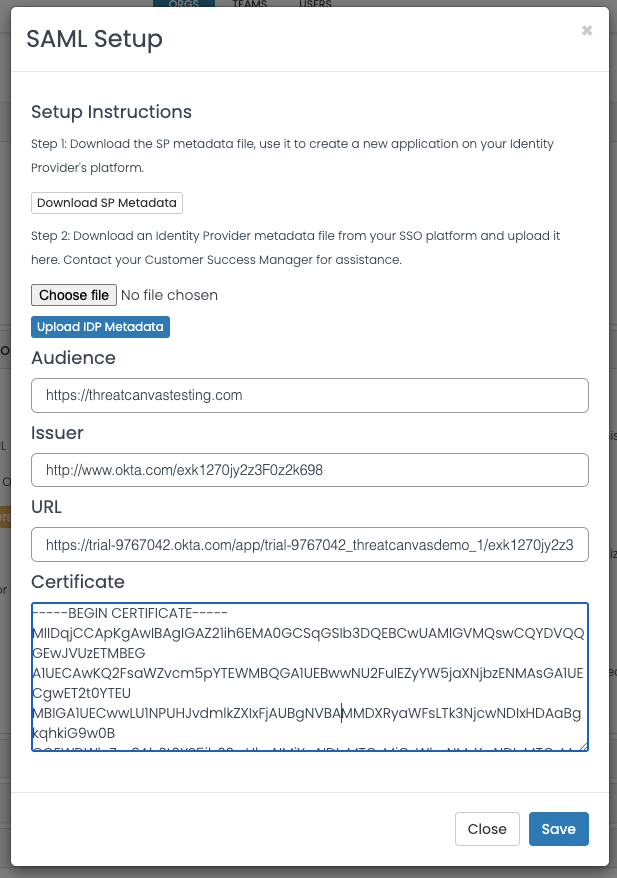
- A modal window will appear to set up SSO.
- Download SecureFlag’s Service Provider (SP) metadata file and install it on your Identity Management platform.
- Once the app has been installed, download the IDP metadata file from your Identity Management platform. Click on Choose file, select the IDP metadata XML file, and upload it to the platform by clicking on Upload IDP Metadata.
- Observe that the fields will be automatically populated after a few seconds.
- Click on Save to save the SSO settings.
- Test/verify SSO authentication before enabling it for your entire user base:
- Do this by activating Single Sign-On (SSO) for a single user to test that everything is working correctly.
- Proceed to the Users tab, access the details of the required user by clicking on the corresponding Details button, and select the Edit option on the top-right corner of the user's profile page.
- A modal window will pop-up; from within the window, toggle the Single Sign-On button to Enabled.
- Then click on Update User.
- Inform the user that their profile has been updated and ask them to log in to the platform. When they do, they will be redirected to the SSO authentication page and authenticated through SSO. Once authenticated, they will be able to successfully log in to the platform.
- Once SSO has been verified, head over back to the Orgs Tab and click on Enable for all users under the Single Sign-On & User Provisioning section to enable SSO for all users.

Note: This will not affect users who are on password-based authentication.
SCIM 2.0 Provisioning
SecureFlag supports the SCIM 2.0 protocol for auto provisioning and deprovisioning users and teams. Work with your Customer Success Manager to ensure the SSO integration's correctness before diving into the SCIM configuration.

IMPORTANT!!!
SCIM integration must be tested before deployment to all accounts.
To test, create a small group of 1-2 accounts to be provisioned to SecureFlag. Once your Customer Success Manager confirms the integration, you may proceed to onboard the rest of the users.
If you are the integration engineer, request an email confirmation from a SecureFlag customer success engineer before pushing a group for testing or onboarding for the first time. You can reach them at success@secureflag.com.
Pushing to a large group of users may result in all accounts within the group receiving an email invite before the onboarding date, which will affect the program.
- To use SCIM 2.0 provisioning for your organisation, ensure that Single Sign-On has already been enabled.
- Generate a SCIM token by clicking on the Generate button. A modal window will appear with the your token. Make sure you save it, you won't be able to view it again and you will have to generate a new one.
- Switch the SCIM toggle to Enabled to start provisioning your users with SCIM.
- Add the SCIM token to your Identity Management platform.
User Deactivation and Deletion Process
When a user is removed from a group or app assignment in your identity management platform (e.g., Okta, Azure, etc.), the identity management platform automatically marks the user as inactive in SecureFlag.
This is the default behavior of the identity management system and cannot be modified or customized. Inactive users continue to count toward your active license quota, and their data remains stored unless manually deleted.
To permanently remove inactive users, refer to the platform-specific guides linked below.
Platform-Specific SSO and SCIM Guides
SSO and SCIM are supported across various platforms, including Azure, Okta, and OneLogin.
Azure
OKTA
OneLogin
Azure
Azure SAML 2.0 – Custom App Integration
When enabling Single Sign-On (SSO), work with your organization’s Integrations Engineer to ensure a smooth onboarding process before commencing the training program.
SecureFlag supports SAML 2.0 or OAuth 2.0 / OIDC protocols.
For the auto-provisioning of users and teams, SecureFlag also supports SCIM 2.0.
This guide provides instructions for setting up Single Sign-On on Azure via SAML using the Create your own application functionality.
Supported features
- SP-initiated SSO
- IDP-initiated SSO
- SCIM (documentation available in a separate document)
Requirements
- The Azure Single Sign-On integration is only available for the Enterprise and Business plans.
- Users will need to be set up on the SecureFlag platform. Make sure that the users’ emails exactly match their Azure accounts.
- Complete the steps below to set everything up.
Note: If setting up multiple SecureFlag applications, speak with your Customer Success Manager; this requires an additional step.Configuration Steps
- Go to https://portal.azure.com/ , and navigate to the Microsoft Entra ID menu, then to Enterprise Applications.
- Click on New Application.
- Select Create your own application.
- Fill in the user-facing app name, then click add.
- The app is now created.
- You can optionally set a logo.
- Click on Properties, and upload a SecureFlag logo. You can download it here.
- Click Save to save your changes.
- Click Configure single sign-on and select SAML.
- Click Upload Metadata File. Select the Service Provider metadata that was obtained from the SecureFlag platform (Click here for instructions on how to get the Metadata file).
- The configuration details will be automatically imported. Click on Save.
- When configuring the SAML claims, use the user email as the Name identifier format. The user email will likely be configured under user.mail although Windows based organizations may have this configured under user.userprincipalname.Confirm this with your Integrations Engineer.
- Download the ‘Federation Metadata XML’ to upload to the SecureFlag platform (Click here for instructions on how to upload the Federation Metadata file).
- You need to assign users to the newly created and configured application.This can be done on an individual level, or with groups. By default when a group is configured on Azure, this will populate in SecureFlag as a Team.
- If you do not want to manage teams in SecureFlag via Azure Groups, you can disable this behavior by adjusting the Attribute mappings.In the attribute mapping settings, set this to No.
Configure your SSO on SecureFlag
Once you have the required Federation Metadata XML file from Azure, navigate to the SAML Setup menu on the SecureFlag platform and upload it there. Refer to this article for more info.
For additional support please contact support at: https://www.secureflag.com/support.html
SCIM 2.0 – Custom App Integration
SecureFlag supports the SCIM 2.0 protocol for auto-provisioning and deprovisioning users and teams. Before implementing the SCIM configuration, work with your CSM to ensure the SSO integration's correctness.
This following guide provides instructions for setting up provisioning using SCIM 2.0.
Supported features
- Create users
- Update user attributes
- Deactivate users
- Group push
Requirements
- Users will need to be set up on the SecureFlag platform. Make sure that the users’ emails match those of their Azure accounts.
- Complete the steps below to configure SCIM.
IMPORTANT!!!
SCIM integration must be tested before deployment to all accounts.
To test, create a small group of 1-2 accounts to be provisioned to SecureFlag. Once your Customer Success Manager confirms the integration, you may proceed to onboard the rest of the users.
If you are the integration engineer, request an email confirmation from a SecureFlag customer success engineer before pushing a group for testing or onboarding for the first time. You can reach them at success@secureflag.com.
Pushing to a large group of users may result in all accounts within the group receiving an email invite before the onboarding date, which will affect the program.
Configuration Steps
- , and navigate to Microsoft Entra ID in the menu to your left, then on Enterprise Applications.
- Browse to the SecureFlag application. Click on Provisioning, then click on Get Started.
- Enter the SCIM endpoint URL https://<Customer_Domain>/rest/scim/v2 and the Secret Token (see this article to get token).Click Test Connection to verify the correct setup.
Note: When a user is deactivated on Azure, the user's status is set to "Inactive" on SecureFlag. An inactive user still counts against the total number of active licenses, and their data is retained in the platform.
To delete users, set up a workflow in Azure to issue a request to the SCIM's DELETE endpoint.
User Deactivation and Deletion Process
When a user is removed from a group or app assignment, Azure marks them as “Inactive” in SecureFlag.
If a user is deleted from the Directory, Azure first marks them as “Inactive” in SecureFlag and, after 30 days, automatically sends a delete request to remove them permanently. This is standard Azure behavior and cannot be customized or configured.
Inactive users still count against your active license quota, and their data is retained unless deleted.
To remove inactive users sooner, you can either:
- Manually delete them from the SecureFlag management interface, or
- Set up a custom Azure workflow that sends a DELETE request to the SecureFlag SCIM endpoint.
Delete SCIM API Endpoint
OKTA
OKTA SAML 2.0
When enabling Single Sign-On (SSO), work with your organization’s Integrations Engineer to ensure a smooth onboarding process before commencing the training program.
SecureFlag supports SAML 2.0 or OAuth 2.0 / OIDC protocols.
For the auto-provisioning of users and teams, SecureFlag also supports SCIM 2.0.
This guide provides instructions for setting up Single Sign-On on OKTA via SAML using a custom Okta App.
Supported Features
- SP-initiated SSO
- IDP-initiated SSO
- SCIM
- SP-initiated SSO
- IDP-initiated SSO
- SCIM
Requirements
- Users will need to be setup on the SecureFlag platform. Make sure that the users’ emails match those of their Okta accounts.
- Complete the steps below to set everything up.
- Users will need to be setup on the SecureFlag platform. Make sure that the users’ emails match those of their Okta accounts.
- Complete the steps below to set everything up.
Configuration Steps
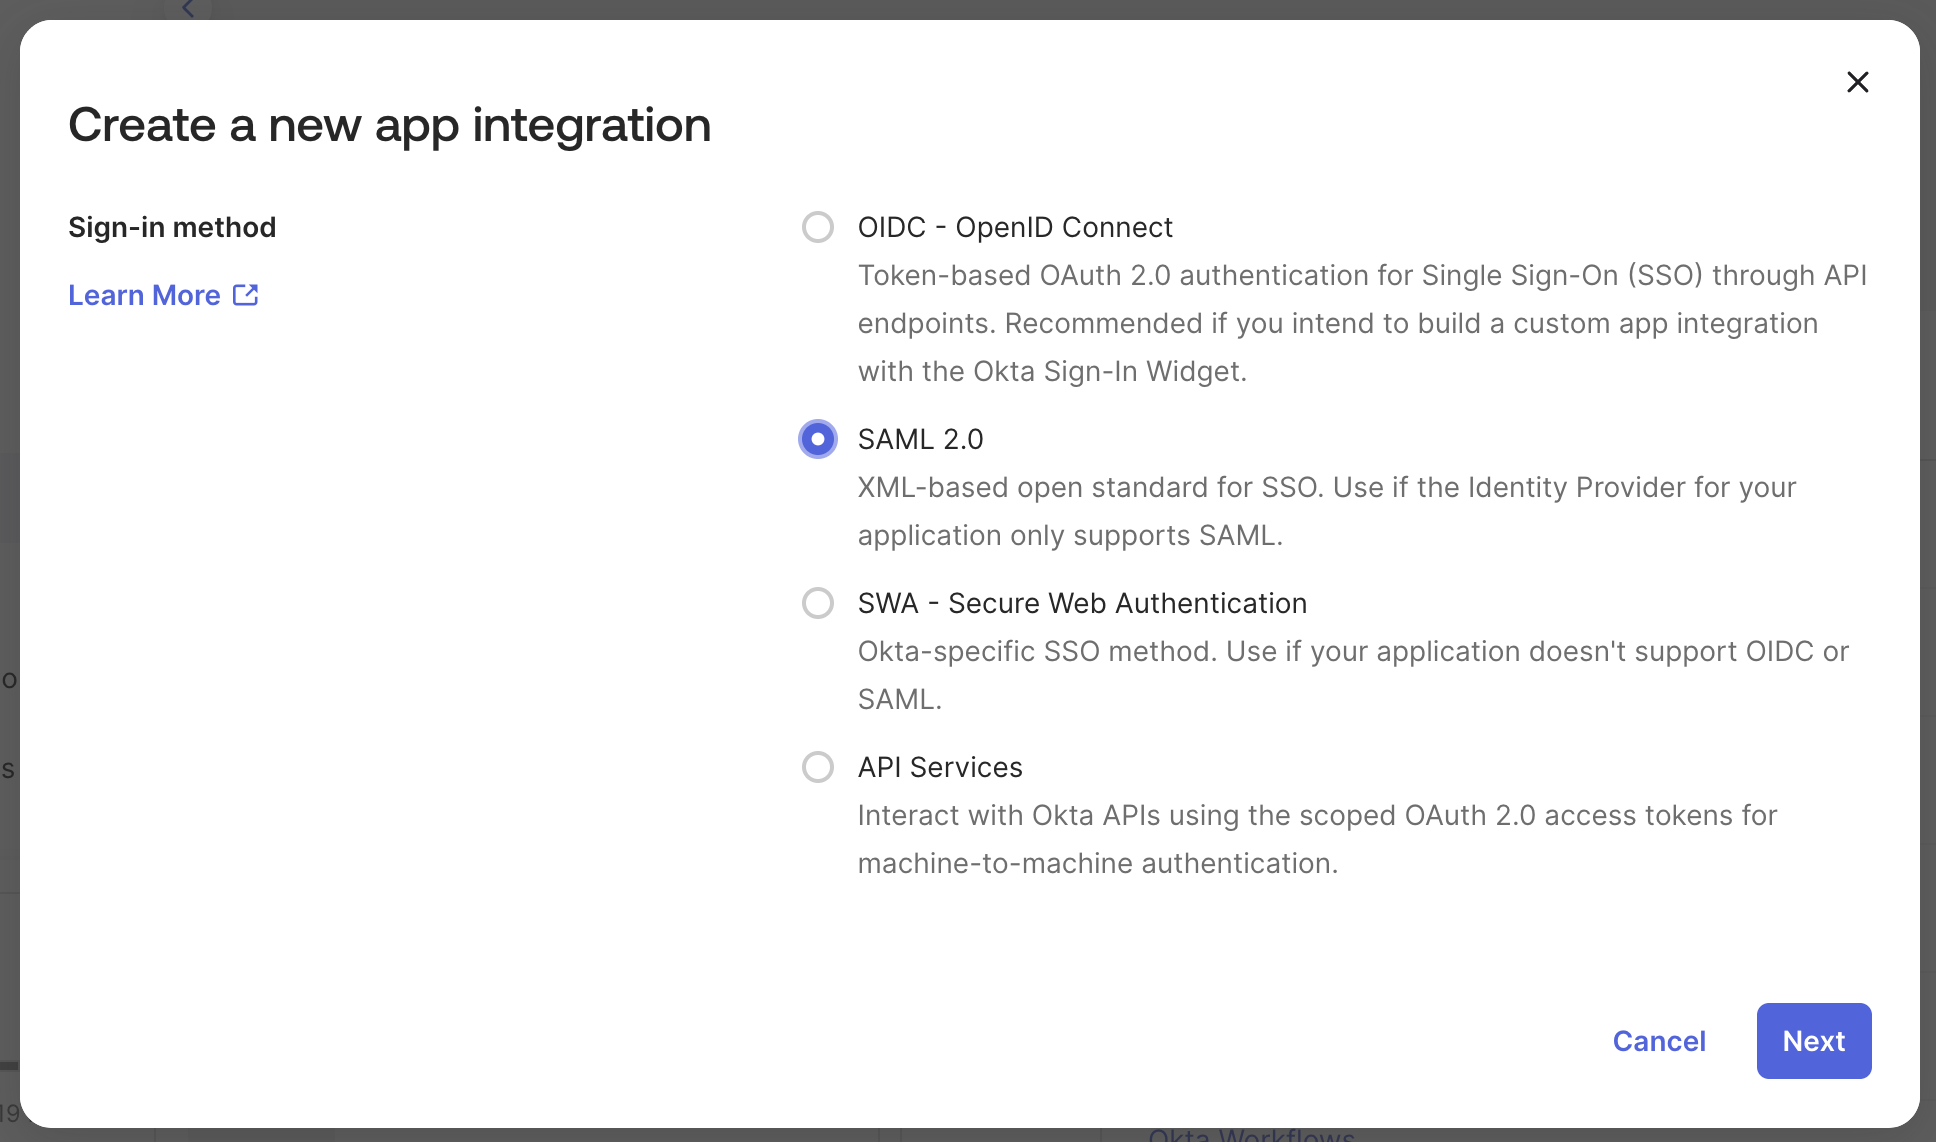
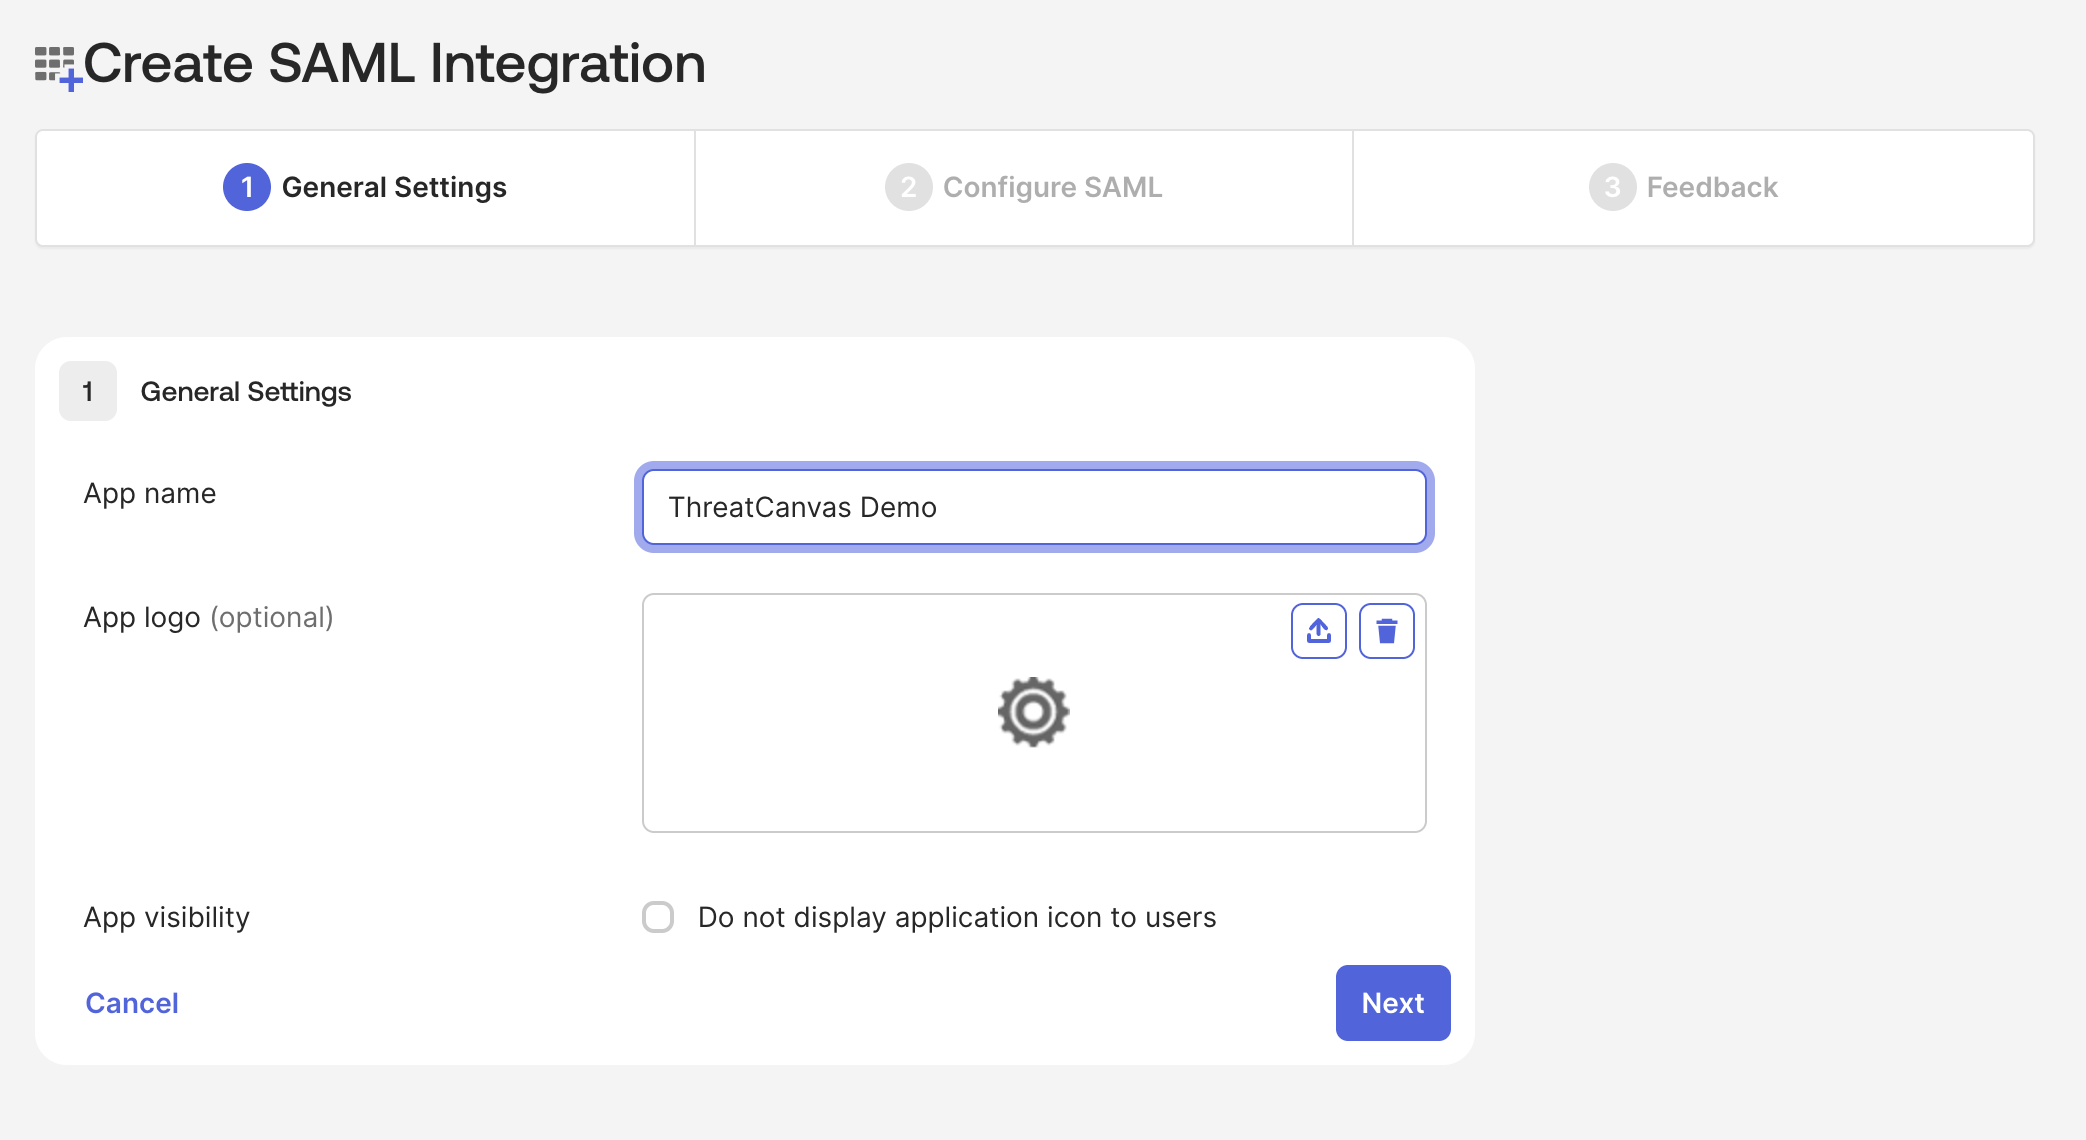
- Create a new app integration in the Okta Admin Console.
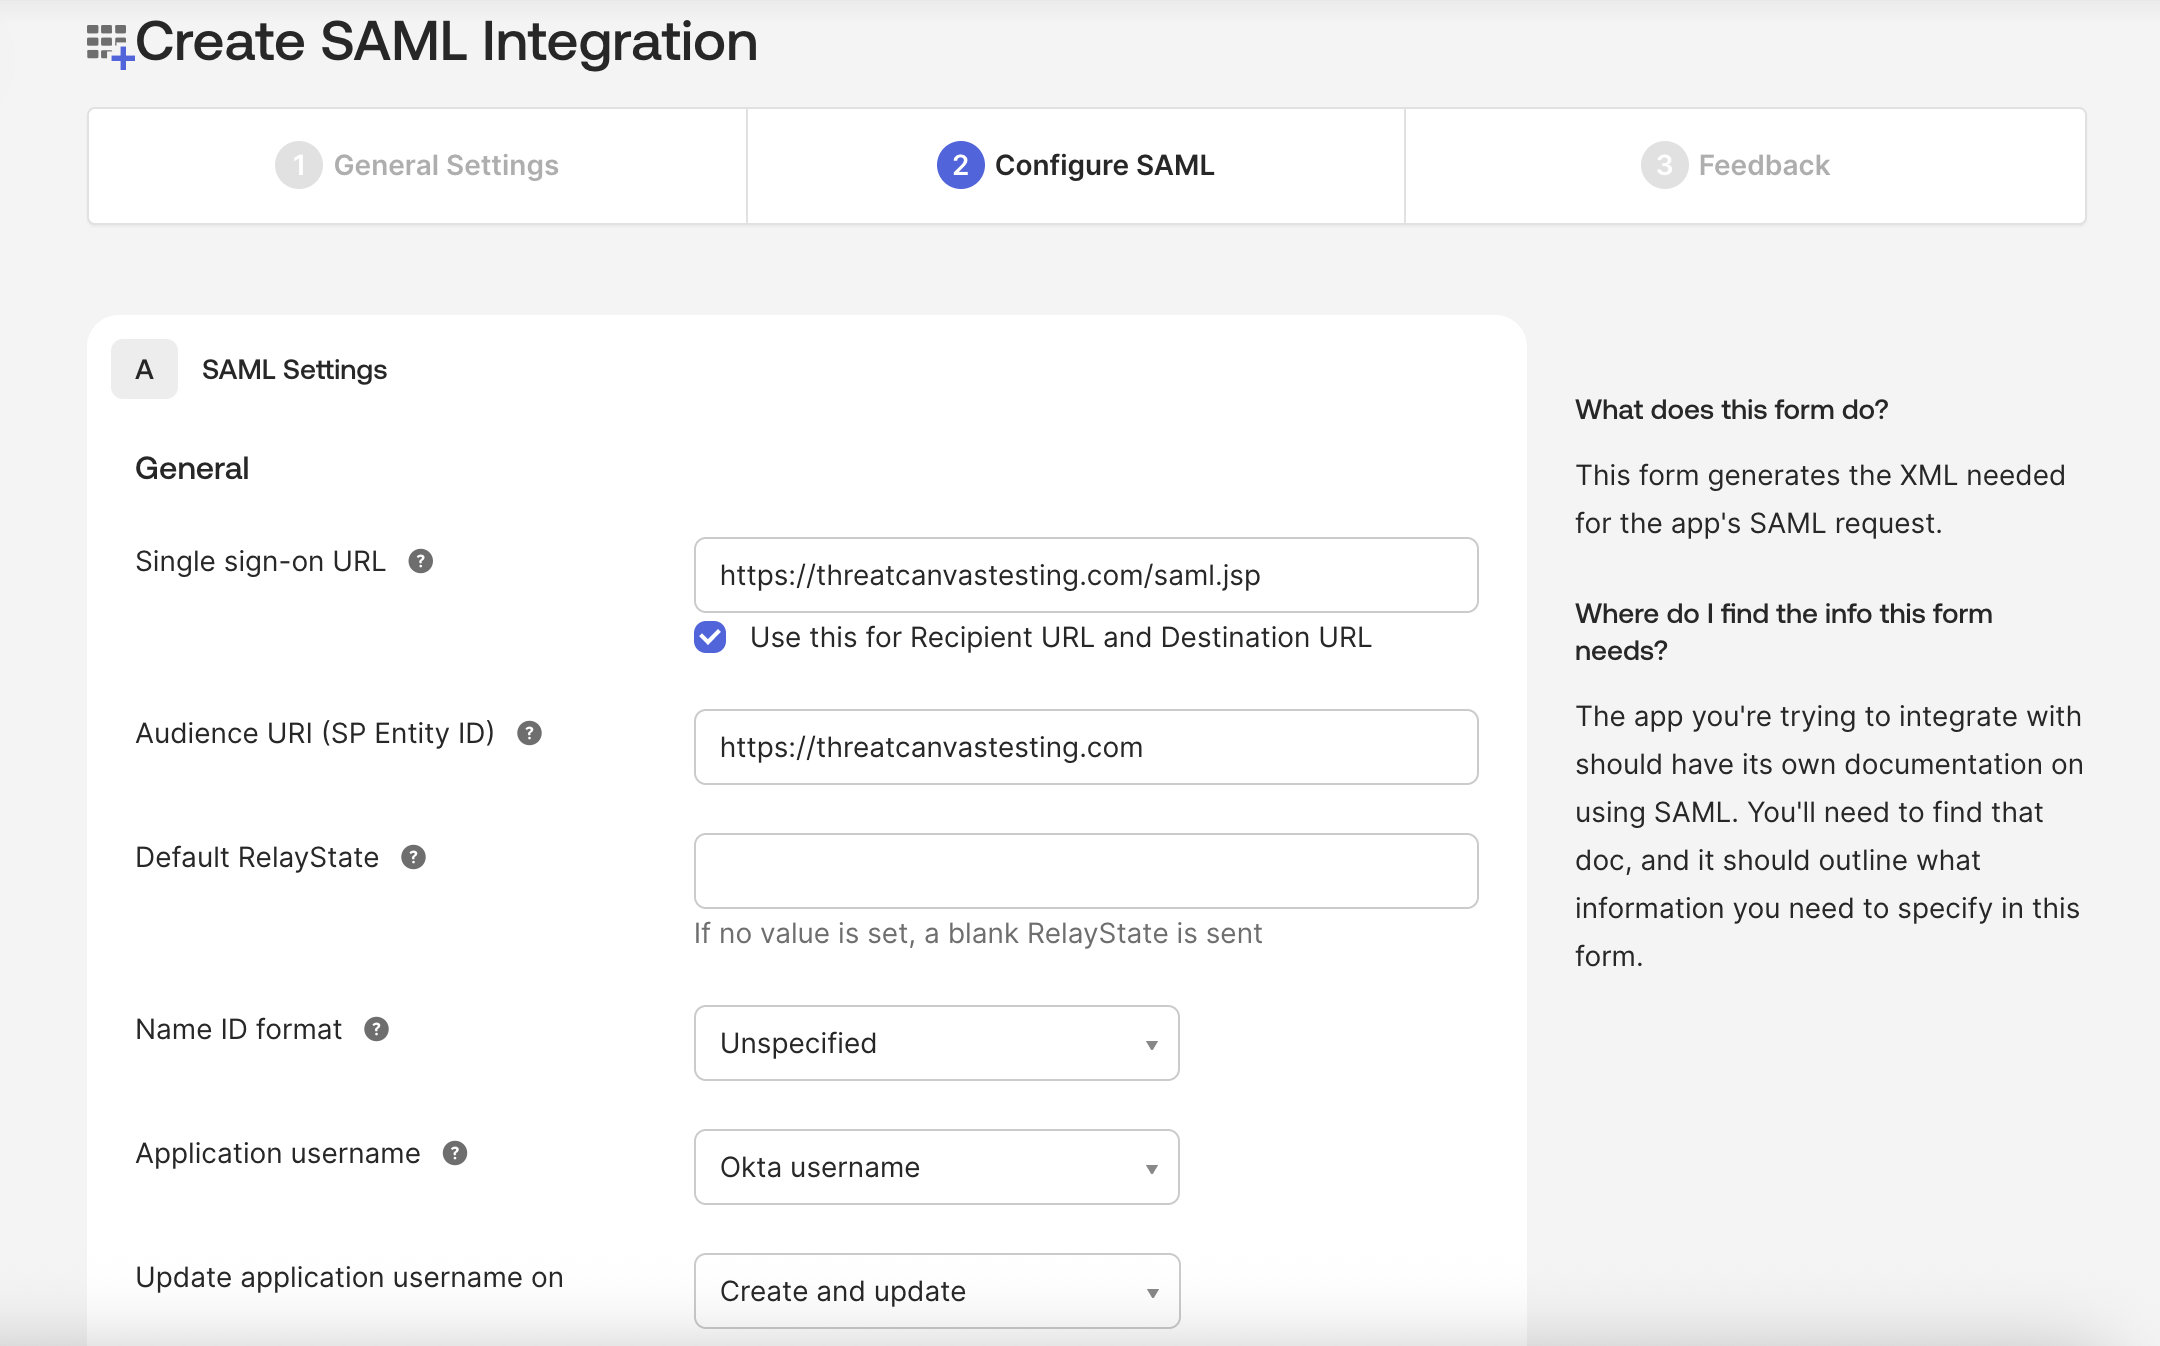
- Configure the SAML integrations. In the following example the URL https://threatcanvastesting.com is used for the customer on-prem instance.
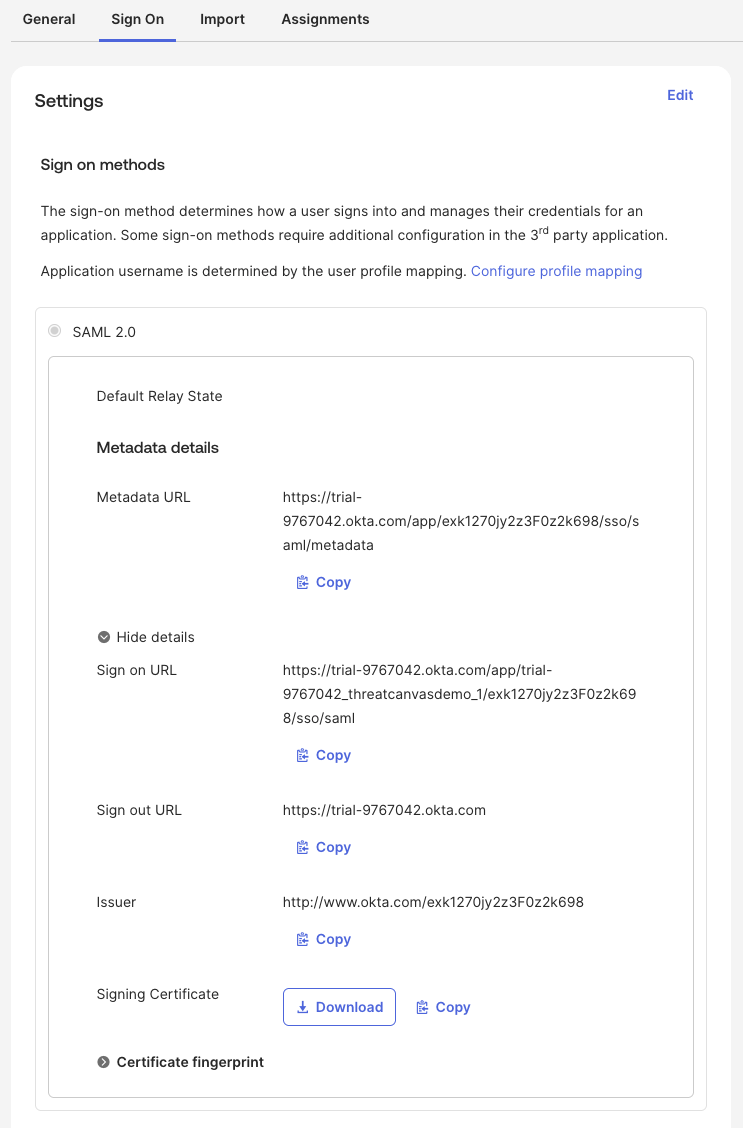
- In the Sign On tab, take note of the “Sign on URL”, “Issuer” and download the “Signing Certificate”. Navigate to the SAML Setup menu on the SecureFlag platform and insert this data there. Refer to this article for more info.
- Follow the relevant Okta guide to assign the App to Users or Groups.
- Create a new app integration in the Okta Admin Console.
- Configure the SAML integrations. In the following example the URL https://threatcanvastesting.com is used for the customer on-prem instance.
- In the Sign On tab, take note of the “Sign on URL”, “Issuer” and download the “Signing Certificate”. Navigate to the SAML Setup menu on the SecureFlag platform and insert this data there. Refer to this article for more info.
- Follow the relevant Okta guide to assign the App to Users or Groups.
SCIM 2.0
SecureFlag supports the SCIM 2.0 protocol for auto-provisioning and deprovisioning users and teams. Work with your CSM to ensure the SSO integration's correctness before diving into the SCIM configuration.
The following guide provides instructions for setting up provisioning.
SecureFlag supports the SCIM 2.0 protocol for auto-provisioning and deprovisioning users and teams. Work with your CSM to ensure the SSO integration's correctness before diving into the SCIM configuration.
The following guide provides instructions for setting up provisioning.
Supported Features
- Create users
- Update user attributes
- Deactivate users
- Group push
- Create users
- Update user attributes
- Deactivate users
- Group push
Requirements
- Users require an account on the SecureFlag platform. Make sure that the users’ emails match those of their Okta accounts.
- Complete the steps below to set everything up.
IMPORTANT!!!
SCIM integration must be tested before deployment to all accounts.
To test, create a small group of 1-2 accounts to be provisioned to SecureFlag. Once your Customer Success Manager confirms the integration, you may proceed to onboard the rest of the users.
If you are the integration engineer, request an email confirmation from a SecureFlag customer success engineer before pushing a group for testing or onboarding for the first time. You can reach them at success@secureflag.com.
Pushing to a large group of users may result in all accounts within the group receiving an email invite before the onboarding date, which will affect the program.
Configuration Steps
- From the Okta admin page, click on the ThreatCanvas Demo application and enable SCIM.
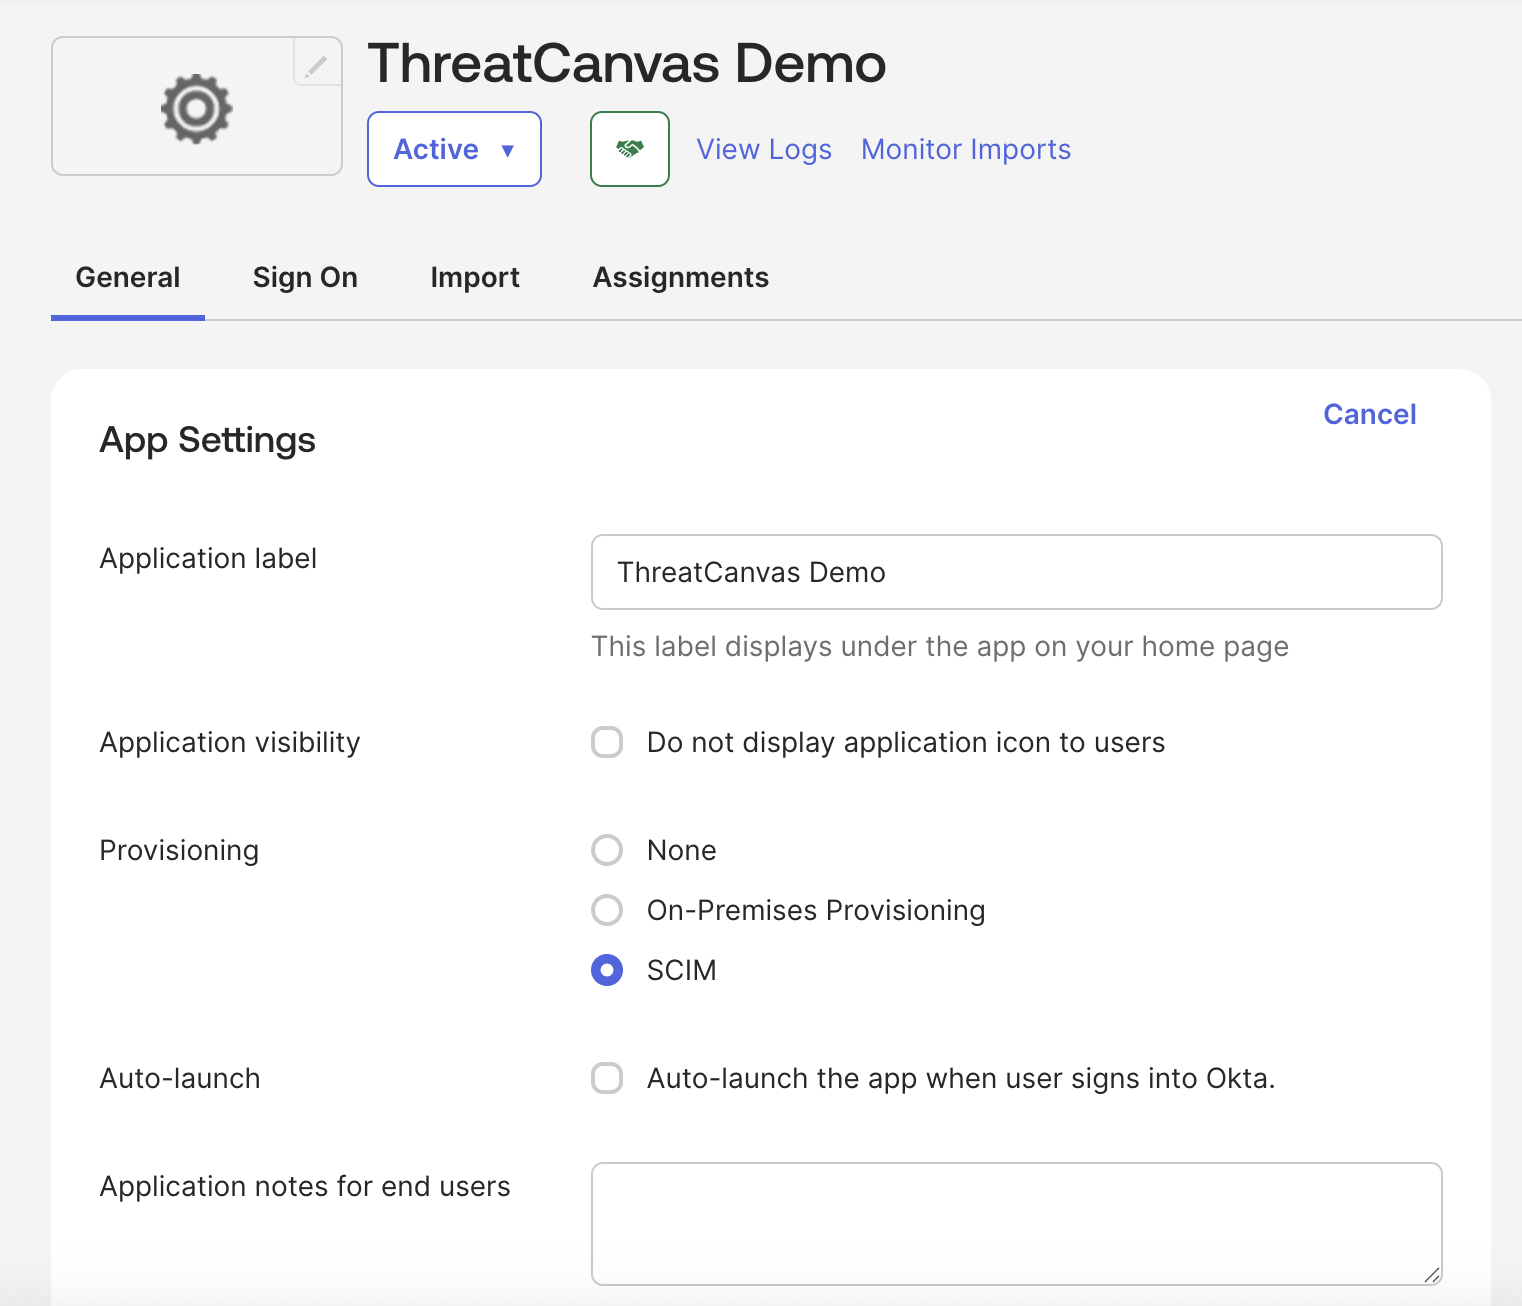
- Switch to the Provisioning tab.
- Click on Configure API Integration.
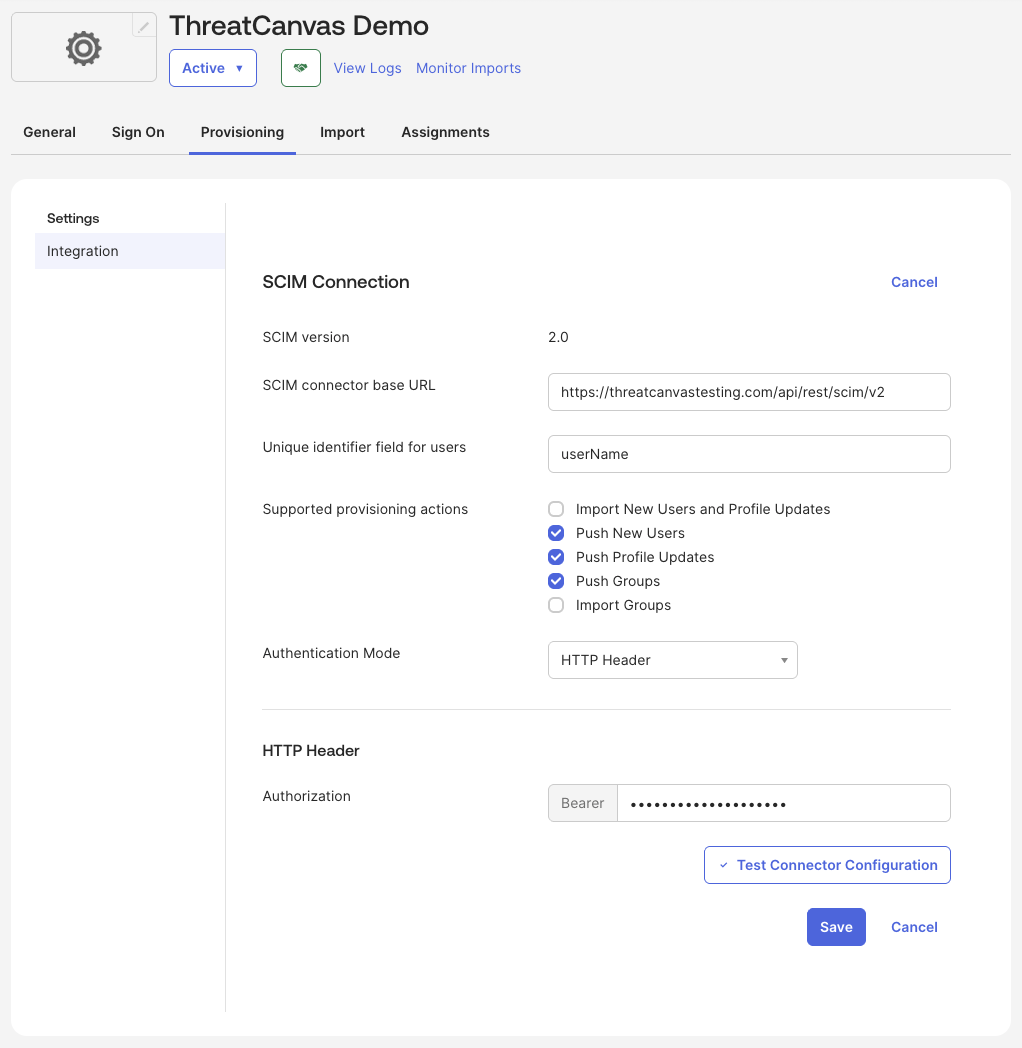
- Enter the Secret Token (see this article to get token). Then click on Test API Credentials. Ensure you receive the message SecureFlag was verified successfully!
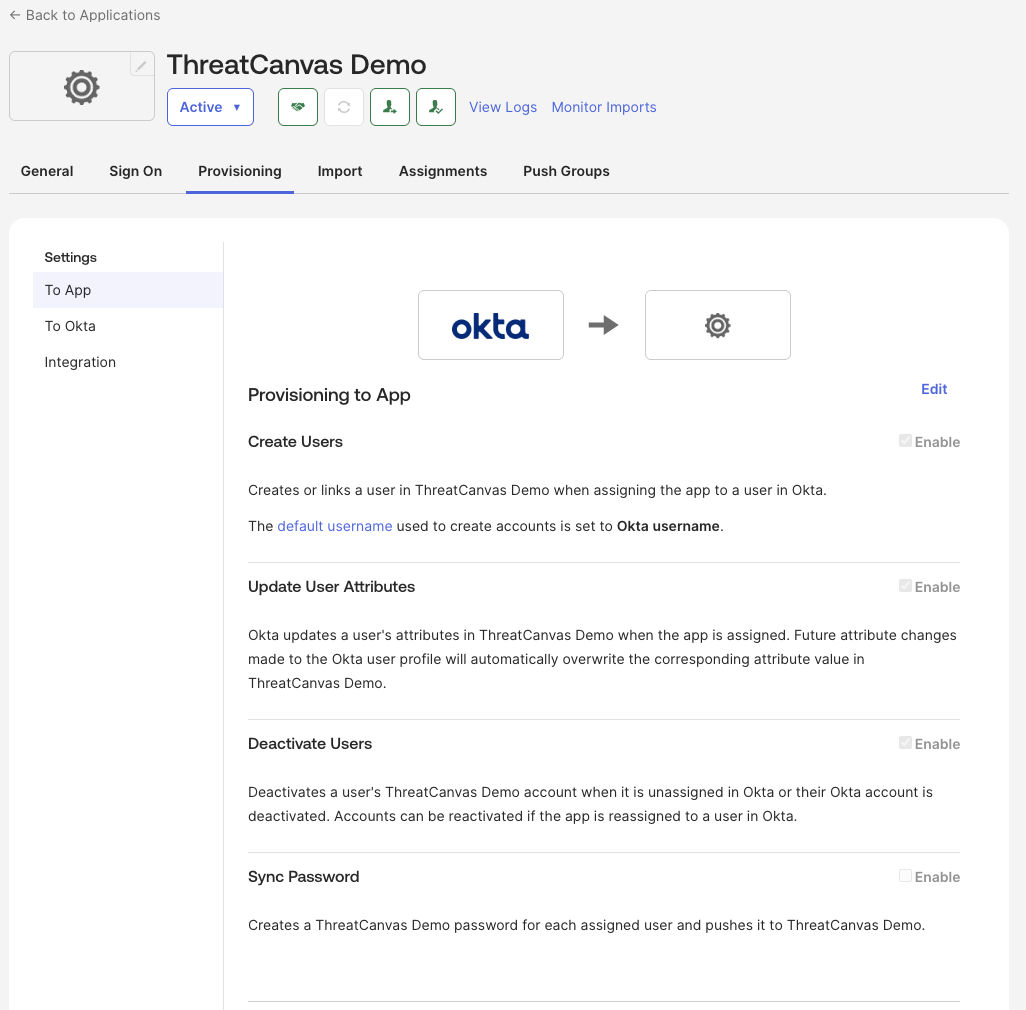
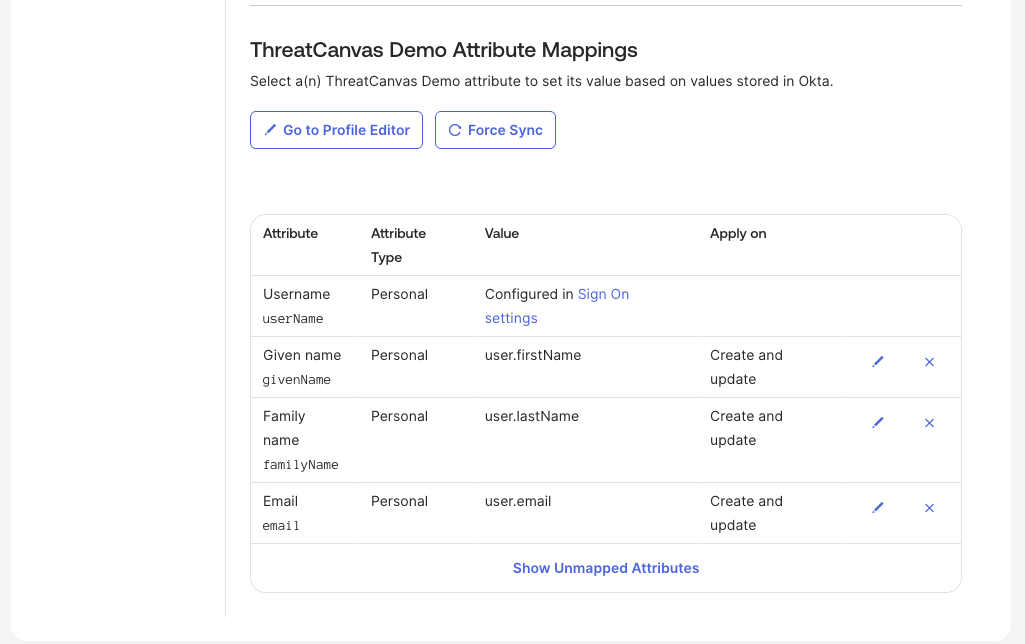
- Click on the To App tab. Click on Edit and enable Create Users, Update User Attributes, and Deactivate Users. Then click on Save.
- Ensure the mappings are kept to the minimum required.
From the Okta admin page, click on the ThreatCanvas Demo application and enable SCIM.
Click on Configure API Integration.
Click on the To App tab. Click on Edit and enable Create Users, Update User Attributes, and Deactivate Users. Then click on Save.
Ensure the mappings are kept to the minimum required.
User Deactivation and Deletion Process
When a user is removed from a group, app assignment, or the Directory, Okta marks them as “Inactive” in SecureFlag. This is standard Okta behavior and cannot be customized or configured.
Inactive users still count toward your active license total, and their data remains stored on the platform.
To permanently delete these users, you can either:- Manually remove them through the SecureFlag management interface, or
- Use an automated workflow in Okta (details below).
When a user is removed from a group, app assignment, or the Directory, Okta marks them as “Inactive” in SecureFlag. This is standard Okta behavior and cannot be customized or configured.
Inactive users still count toward your active license total, and their data remains stored on the platform.
To permanently delete these users, you can either:
- Manually remove them through the SecureFlag management interface, or
- Use an automated workflow in Okta (details below).
Delete SCIM API Endpoint
To delete users, set up a workflow in Okta to issue a request to the SCIM’s DELETE endpoint, To do so, follow the below steps:
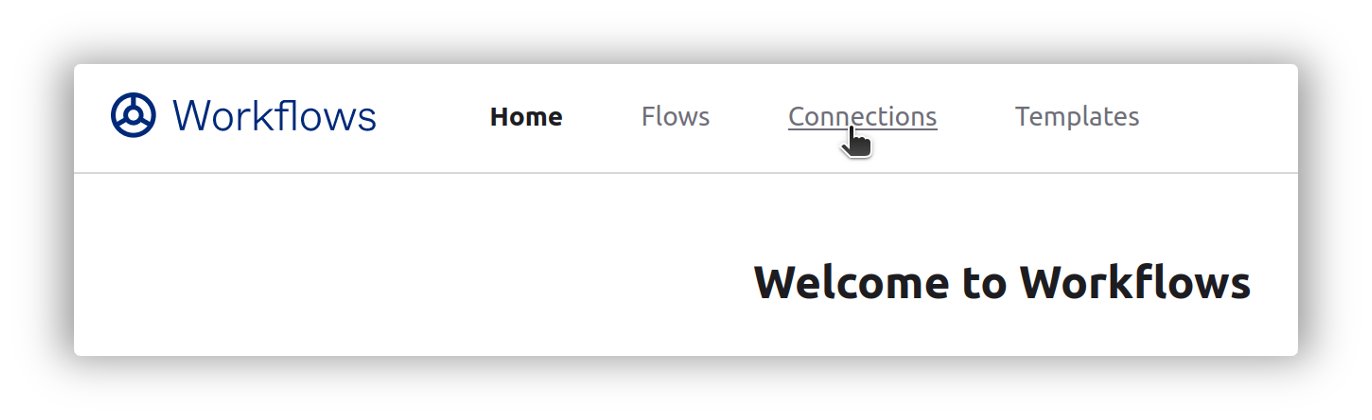
- Go to the Okta Workflow Console. This can be found under Workflow > Workflows Console from the main Okta page.

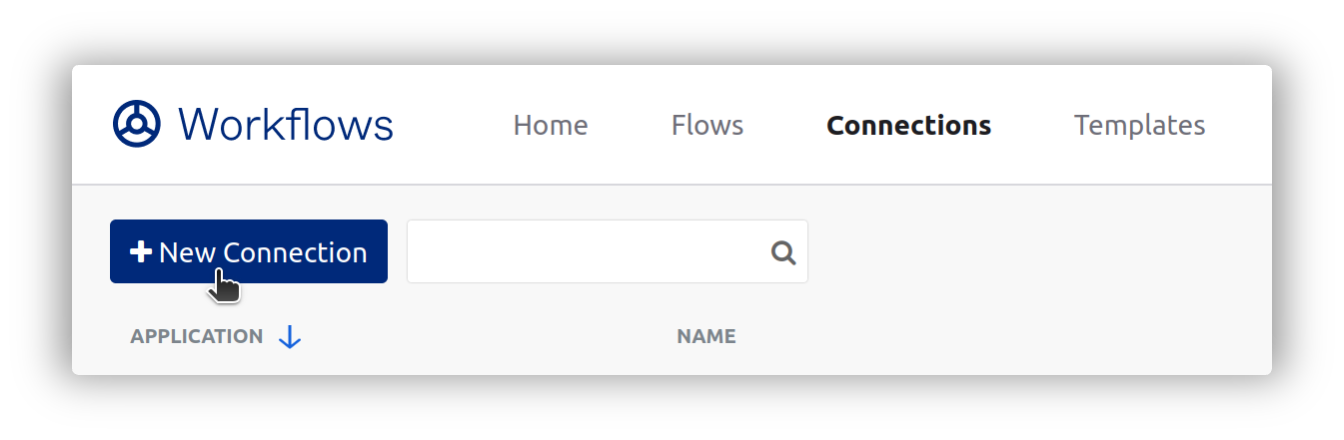
- From the Connections page, click New Connection. Then, find SecureFlag.
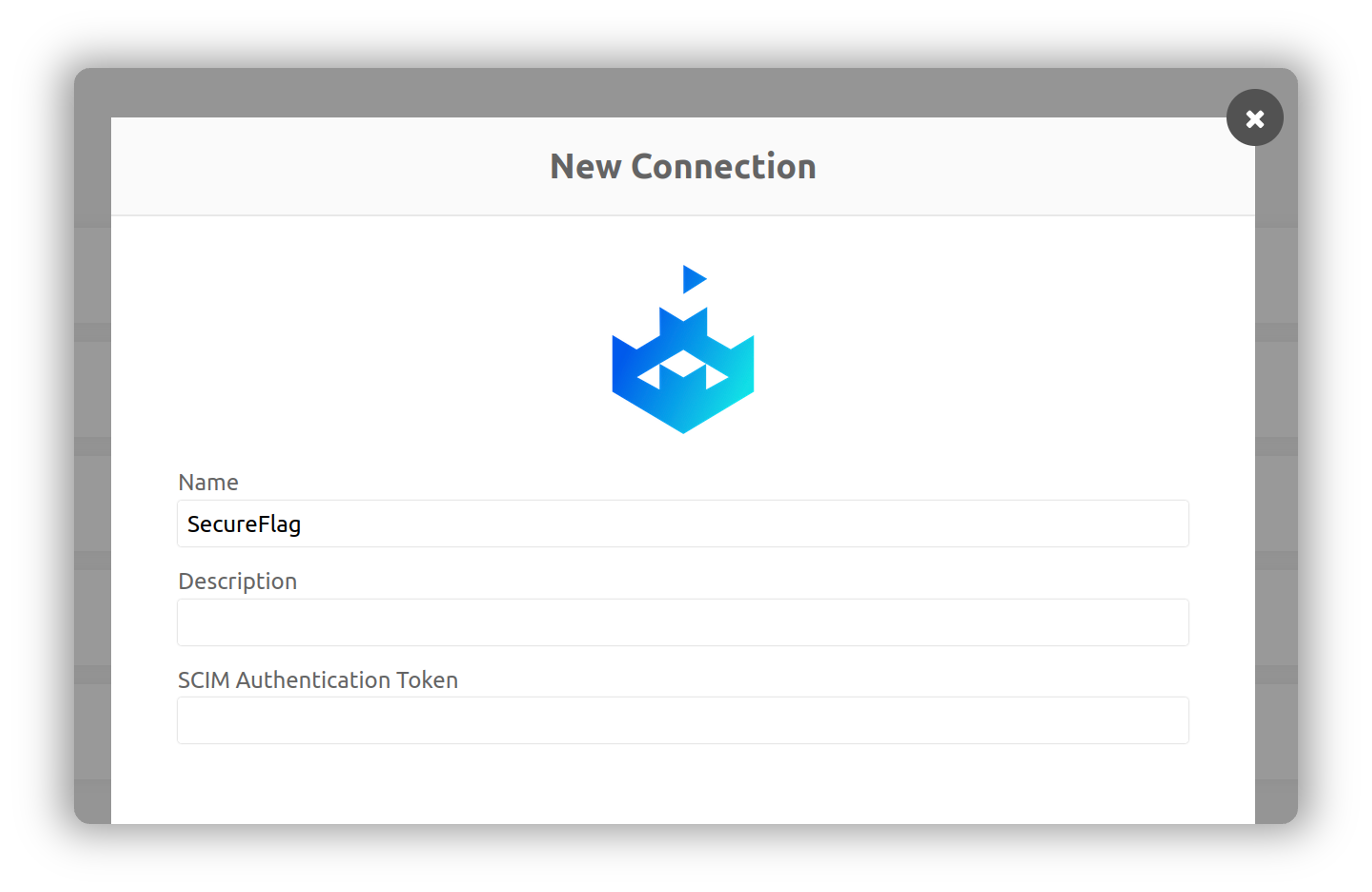
- In the New Connection dialog, add a string to the Name textfield. This is useful when creating multiple connections to share with your team.
- Paste the SCIM token created in the prerequisites section into the SCIM Authentication Token field. Click Create.
- Now, you have access to the Remove User License card as part of the SecureFlag Connector. Below is an example workflow that removes the SecureFlag license of a user when their account is deactivated.

To delete users, set up a workflow in Okta to issue a request to the SCIM’s DELETE endpoint, To do so, follow the below steps:
- Go to the Okta Workflow Console. This can be found under Workflow > Workflows Console from the main Okta page.
- From the Connections page, click New Connection. Then, find SecureFlag.
- In the New Connection dialog, add a string to the Name textfield. This is useful when creating multiple connections to share with your team.
- Paste the SCIM token created in the prerequisites section into the SCIM Authentication Token field. Click Create.
- Now, you have access to the Remove User License card as part of the SecureFlag Connector. Below is an example workflow that removes the SecureFlag license of a user when their account is deactivated.
SecureFlag Okta User Delete Workflow Connector
Authorization
Generate a SCIM token using the instructions here. Then, create a connection as follows:
- From the Connections page, click New Connection.
- In the New Connection dialog, add a string to the Connection Nickname dialog. This is useful when creating multiple connections to share with your team.
- Paste the SCIM token created in the prerequisites section into the SCIM Authentication Token field.
- Click Create.
Cards - Remove SecureFlag License
Removes a SecureFlag license corresponding to the given user email. Returns nothing unless an error occurs.
Inputs:
Label Definition Type Required User Email User Email of the SecureFlag license to remove Text Yes
Outputs:
Label Definition Type User Email User Email of the SecureFlag license to remove Number
You can find the example flow in Delete SCIM API Endpoint section.
Removes a SecureFlag license corresponding to the given user email. Returns nothing unless an error occurs.
Inputs:
Label | Definition | Type | Required |
User Email | User Email of the SecureFlag license to remove | Text | Yes |
Outputs:
| Label | Definition | Type |
User Email | User Email of the SecureFlag license to remove | Number |
You can find the example flow in Delete SCIM API Endpoint section.
OneLogin
OneLogin SSO and SCIM Guide
- Login to the OneLogin Admin console.
- In the Applications tab, select Applications.
- Click Add App.
- Search SCIM Provisioner with SAML.
- Select SCIM Provisioner with SAML (SCIM v2 Enterprise, full SAML).
- Use the following images that can be downloaded from the SecureFlag website:
- Square Icon: https://threatcanvas.customer-example.internal/assets/img/logo_small.png
- Rectangular Icon: https://threatcanvas.customer-example.internal/assets/img/images/secureflag-logo.png
- Description: SecureFlag Secure Coding Training & Threat Modeling
- Click on Save.
- Once saved, the left menu will be populated with additional tabs.
- Click on Configuration (left side menu).
- Enter the following details (leave all other fields with the default value)
- Recipient: https://threatcanvas.customer-example.internal/saml.jsp
- ACS (Consumer) URL Validator: ^https:\/\/threatcanvas\.customer-example\.internal\/saml.jsp$
- ACS (Consumer) URL*: https://threatcanvas.customer-example.internal/saml.jsp
- Login URL: https://threatcanvas.customer-example.internal/login.html
- SAML not valid before: 3
- SAML not valid on or after: 3
- SAML initiator: OneLogin
- SAML nameID format: Email
- SAML sessionNotOnOrAfter: 1440
- Click on Save.
SCIM Configuration
- Click on Configuration, then enter:
- SCIM Base URL: https://<Customer_Domain>/api/rest/scim/v2
- SCIM Bearer Token: [Your generated SCIM token goes here]
- To generate your SCIM token on the SecureFlag Platform, check out section SCIM 2.0 Provisioning above.
- Click on Enable.
- Click on Save.
- Click on Parameters (left side menu).
- Change the value of scimusername to Email.
- Click on Provisioning (left side menu).
- Click on Enable Provisioning.
- Click on Save.
- Click on More Actions > Click on SAML Metadata.
- Install on the SecureFlag portal, more info on that here.
SAML Custom Claims
SecureFlag supports parsing custom SAML attributes to configure user access, including roles, teams, managers, tags, and ThreatCanvas project permissions.
Important Considerations:
- Custom claims are applied only if Custom SAML Claims is enabled on the target organization.
- When enabled, any attribute returned in the SAML assertion overrides the existing user values (including those set via the Web Management interface).
To enable SAML Custom Claims provisioning:
- Go to the Orgs tab.
- Click Details for your organization.
- In the Single Sign-On & User Provisioning panel, enable the SAML Custom Claims toggle.
Custom SAML Attributes
Organization Selector
Specifies which organization to create the user in when multiple orgs share the same SAML configuration. If omitted, the first matching org is used.
Attribute | Type | Example |
sf_org | integer | 42 |
Role
Defines the user’s role on the SecureFlag platform.
Attribute | Type | Example |
sf_role | integer | 3 |
The following roles are available:
Integer | Role Name |
0 | Organization Admin |
| 3 | Team Manager |
4 | Stats |
5 | Creator |
6 | ThreatCanvas Reviewer |
7 | User |

Tip: Assign the role with the least privilege necessary. Setting
sf_role also controls eligibility for sf_managed_teams (only valid for Team Manager and Organization Admin roles).Team Membership
Assigns the user to a team.
Attribute | Type | Example |
sf_team | string (team name) | Blue Team |
Managed Teams
Grants the user manager permissions over specific teams. Only applied if the user’s role is Team Manager or Organization Admin.
Attribute | Type | Example |
sf_managed_teams | comma-separated list of strings | Blue Team, Red Team |
Manager
Specifies the email address of the user’s manager.
Attribute | Type | Example |
sf_manager | string |
Tags
Adds a list of tags to the user.
Attribute | Type | Example |
sf_tags | comma-separated list of strings | Security, EMEA, Contractor |
ThreatCanvas Projects
Defines project permissions for ThreatCanvas.
Attribute | Type | Example |
sf_projects | map | {"Project Alpha" : "RW", "Project Beta": "RO"} |
Permission Values:
RO= Read OnlyRW= Read/Write
Example SAML Assertion
<saml2:Assertion xmlns:saml2="urn:oasis:names:tc:SAML:2.0:assertion"> <saml2:Issuer>https://idp.example.com/12345</saml2:Issuer> <saml2:Subject> <saml2:NameID Format="urn:oasis:names:tc:SAML:1.1:nameid-format:emailAddress"> </saml2:NameID> </saml2:Subject> <!-- First name --> <saml2:Attribute Name="http://schemas.xmlsoap.org/ws/2005/05/identity/claims/givenname"> <saml2:AttributeValue>Jane</saml2:AttributeValue> </saml2:Attribute> <!-- Last name --> <saml2:Attribute Name="http://schemas.xmlsoap.org/ws/2005/05/identity/claims/surname"> <saml2:AttributeValue>Doe</saml2:AttributeValue> </saml2:Attribute> <!-- Optional org selector --> <saml2:Attribute Name="sf_org"> <saml2:AttributeValue>42</saml2:AttributeValue> </saml2:Attribute> <!-- Role --> <saml2:Attribute Name="sf_role"> <saml2:AttributeValue>3</saml2:AttributeValue> </saml2:Attribute> <!-- Team Membership --> <saml2:Attribute Name="sf_team"> <saml2:AttributeValue>Blue Team</saml2:AttributeValue> </saml2:Attribute> <!-- Managed Teams --> <saml2:Attribute Name="sf_managed_teams"> <saml2:AttributeValue>Blue Team,Red Team</saml2:AttributeValue> </saml2:Attribute> <!-- Manager --> <saml2:Attribute Name="sf_manager"> <saml2:AttributeValue>lead.manager@example.com</saml2:AttributeValue> </saml2:Attribute> <!-- Tags --> <saml2:Attribute Name="sf_tags"> <saml2:AttributeValue>Security,EMEA,Contractor</saml2:AttributeValue> </saml2:Attribute> <!-- ThreatCanvas Projects --> <saml2:Attribute Name="sf_projects"> <saml2:AttributeValue>{ "Project Alpha": "RW", "Project Beta": "RO" }</saml2:AttributeValue> </saml2:Attribute></saml2:Assertion>
Additional References
Please follow configuration instruction to setup custom SAML attributes for your Identity Provider.
- Okta: How to define and configure a custom SAML attribute statement
- Azure AD/Entra ID: SAML claims customization
Just-in-Time (JIT) User Provisioning
This guide explains how to configure SecureFlag Single Sign-On to enable Just-in-Time (JIT) user provisioning.
With JIT provisioning enabled, a user can automatically create an account in SecureFlag upon their first successful authentication. SecureFlag redirects the user to the organization’s Identity Provider (IdP), and after validating both the authentication and the user’s access rights, creates the account.
Note: Advanced User provisioning and lifecycle management can also be handled via SCIM. JIT Provisioning Use Cases
- SCIM is not available.
- The organization would like to grant access to all users but only create an account on SecureFlag the first the time the user authenticates.
To Enable JIT Provisioning
- Go to the Orgs tab.
- Click Details for your organization.
- In the Single Sign-On & User Provisioning panel, enable the JIT toggle.
Authorization Note: Ensure that users are assigned to the SecureFlag application in your IdP. Assignment can be done either directly to individual users or through group membership.The sections below describe the JIT provisioning flow for SAML 2.0 and OAuth 2.0, along with setup details depending on your organization’s SSO configuration.
JIT Provisioning with SAML 2.0
When a user authenticates via SAML 2.0, authentication may be IdP-initiated (e.g. Identity Provider Dashboard) or SP-initiated (SecureFlag’s login page).
IdP-Initiated Flow
- The user clicks the SecureFlag tile in their IdP dashboard.
- SecureFlag reads the SAML Issuer and matches it to one or more orgs associated with that IdP.
- When a valid SAML assertion is received, SecureFlag creates the account. The NameID attribute is used as the username/email.
Configuration Scenarios:
- Single org bound to the Issuer → no extra configuration.
- Multiple orgs with the same Issuer → include the sf_org claim to select the target org.
- Multiple orgs with different SAML configurations → no extra configuration needed.
SP-Initiated Flow
- The user visits the SecureFlag login page and enters their email.
- SecureFlag matches the domain portion of the email against:
- The main contact domain for the org (set by Customer Success), or
- The org’s list of allowed SSO domains (set by Customer Success).
- When a valid SAML assertion is received, SecureFlag creates the account. The NameID attribute is used as the username/email.
Configuration Scenarios
- Single Organization → no extra configuration.
- Multiple Organizations with different, non-overlapping email domains → no extra configuration.
- Multiple Organizations with overlapping email domains:
- If orgs use the same SAML config → include the sf_org claim to select the org.
- If orgs use different SAML configs → only one Organization can have JIT enabled; if multiple are enabled, the first is selected by default.
SAML JIT Provisioning Required Attributes
SAML assertions must include first name and last name. SecureFlag recognizes several attribute names (case-insensitive):
Property | Recognized Attribute Name |
First Name | FirstName, firstName, givenName, user.givenname, http://schemas.xmlsoap.org/ws/2005/05/identity/claims/givenname |
Last Name | LastName, lastName, sn, surname, user.surname, http://schemas.xmlsoap.org/ws/2005/05/identity/claims/surname |
Related Articles
Single Sign-On and SCIM Platform Setup
SecureFlag supports both SAML 2.0. SCIM 2.0 is also supported for the auto-provisioning of users and teams. Work with your Customer Success Manager to ensure the SSO configuration's correctness before diving into the training program. This guide will ...